> For the complete documentation index, see [llms.txt](https://docs.dietrichs.com/llms.txt). Markdown versions of documentation pages are available by appending `.md` to page URLs; this page is available as [Markdown](https://docs.dietrichs.com/tutorials/tutorials-en/learning-the-basics/exploration-journey/program-modules/floor-plan-1-2-1/walls-and-wall-buildups.md).
# Walls & Wall Buildups
INSTRUCTION TYPE: Exploration\
INSTRUCTION TITLE: Examining Wall Systems and Properties\
CATEGORY: Structural Elements\
OBJECTIVE: Learn how walls are designed by exploring geometry, placement, and material properties
PREREQUISITES:
* Understanding of floor systems
* Basic 3D navigation skills
EXPERTISE LEVEL: Novice
PARAMETERS:
* Wall Height: Vertical dimension of wall elements
* Wall Position: Placement and orientation in the floor plan
* Wall Materials: Layered construction of wall assemblies
STEPS:
1. Switch to the Floor Plan module using Option 1-2-1
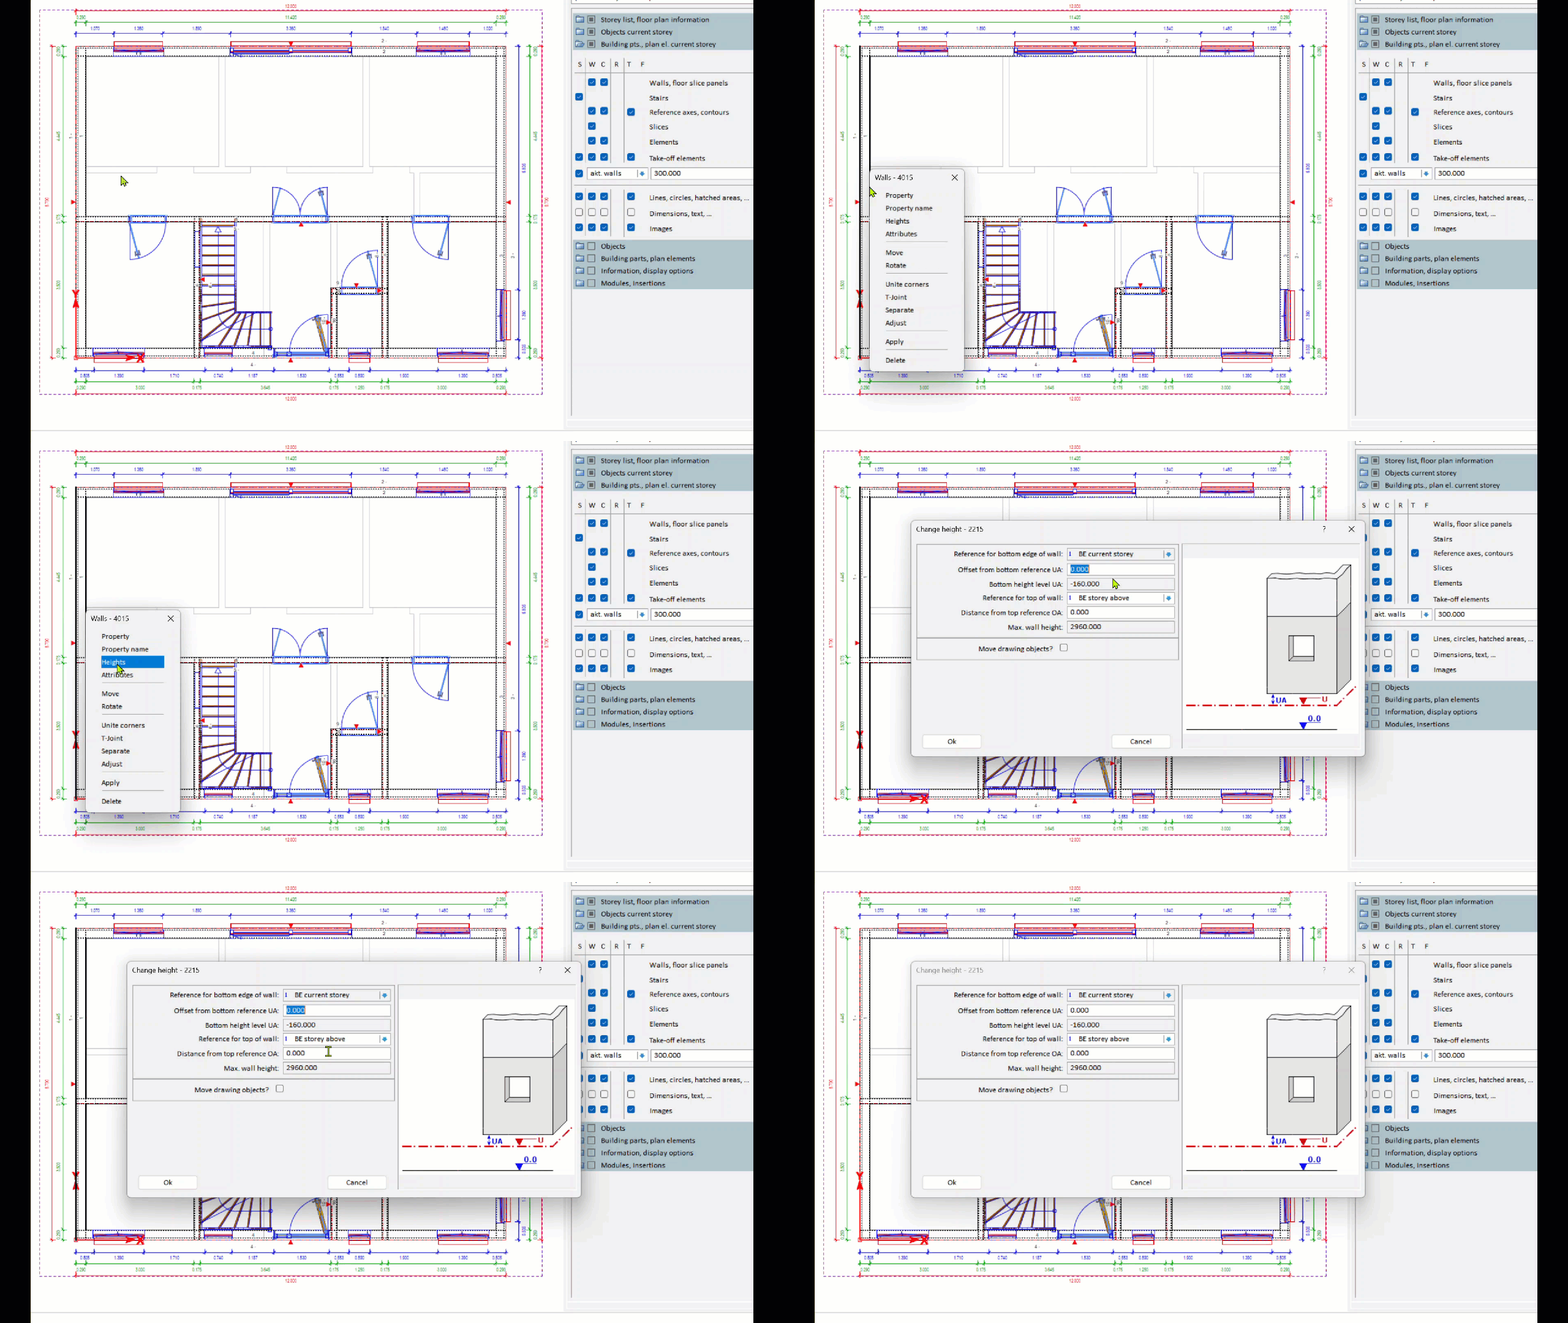
2. Right-click on a wall in the view
3. Select "Height" from the context menu to view current height settings
4. View the walls in 3D by using Option 9-6 (OpenGL view)
5. Change a wall's height:
* Right-click on the wall and select "Height" (or use Option 3-03)
* Enter a new value when prompted
6. Reposition a wall:
* Select Option 3-6 to activate the move command
* Double-click on a wall to select it
* Drag it to a new position and observe how it affects adjacent walls
*
```
```
7. Delete a wall:
* Select the wall you wish to remove
* Use Option 3-07 to delete it
8. Create a new wall:
* Select Option 2-3 to start the wall creation tool
* Choose a wall type from the catalog in the pop-up dialog
* Click to place start and end points of the new wall
9. Examine wall materials:
* Right-click on a wall and select "Property"
* Review the layers that make up the wall assembly
* Choose a different wall buildup from the available options
* Observe how this changes the appearance and properties of the wall
EXPECTED RESULTS: You should understand how walls are constructed in layers and be able to perform basic wall modifications including creating, moving, deleting, and changing wall types.
COMMON VARIATIONS:
* Interior and exterior walls will have different construction types
* Load-bearing walls may have additional structural elements
TROUBLESHOOTING:
* If walls don't connect properly: Check snapping settings
* If wall height changes don't appear: Verify the view is updated or refresh
FOLLOW-UP ACTIONS:
* Explore roof geometry and properties
* Learn to add door and window openings in walls
* Understand how walls connect to floors and roof structures
QUERY EXAMPLES: "How do I create a new wall?", "Can I change the wall material after it's built?", "How do I make walls different heights?"